Author: deandragoudy

  • Buttermilk Biscuits

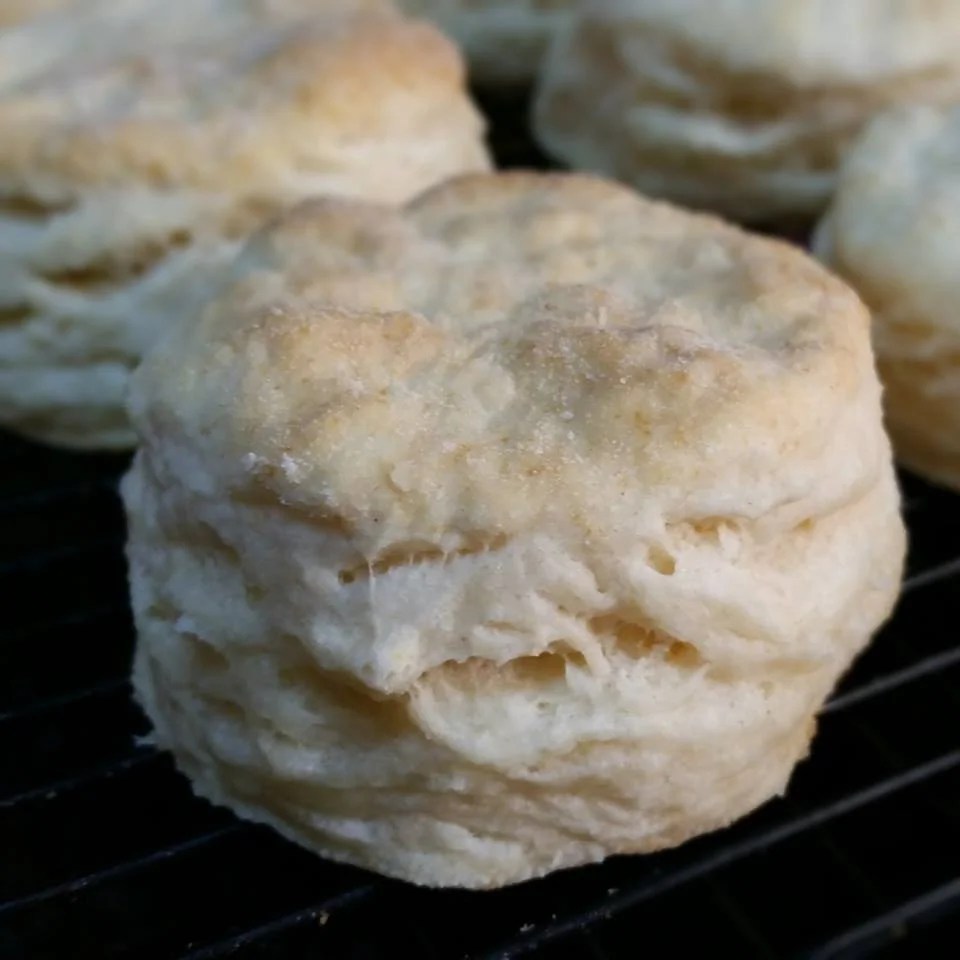
    Buttermilk Biscuits

    I have been searching for a buttermilk biscuit recipe that I love and that is easy for everyone, and I believe I have finally found it! It is simple and only requires three ingredients, okay a little bit more if you do not have self rising flour or buttermilk but those are an easy fix.

    INGREDIENTS

    1 stick (1/2 cup) butter, cold, plus more for the pan

    2 1/4 cups self-rising flour* (you may need up to 1 cup more flour if the dough is sticky)

    1 1/4 cups buttermilk*, cold

    DIRECTIONS

    Preheat the oven to 450°F (232°C).

    Cut the cold butter into 1/4-inch-thick cubes. Add the butter to the flour in a large bowl. With a pastry blender, cut the butter until the mixture resembles coarse crumbles. If you do not have a pastry blender, you can use a fork. Cover and refrigerate for 10 minutes. Lightly butter your baking sheet.

    Next, add the buttermilk to the flour mixture, stirring just until the flour is moistened. The dough will be very sticky. On a lightly floured surface, turn the dough out and knead 3 or 4 times, gradually adding flour as needed. Press the dough into a rectangle and fold over onto itself in three sections, do this two more times.

    Use your hands to pat or a rolling pin to press the dough down into a 1/2-inch thickness on a lightly floured surface. Cut the dough with a floured 2-inch cutter. Place the biscuits side by side on the prepared baking sheet or jelly-roll pan. The biscuits should touch. (not all of mine were touching but they came out just fine)

    Bake the biscuits for 13 to 15 minutes, or until lightly browned. Brush the tops with the melted butter and let them cool ever so slightly. 

    * If you do not have self rising flour, add 3 tsp of baking powder and 1 tsp of salt.

    * If you do not have buttermilk, add 1 Tbl + 3/4 tsp of distilled vinegar to the milk and let it sit for 10 minutes.
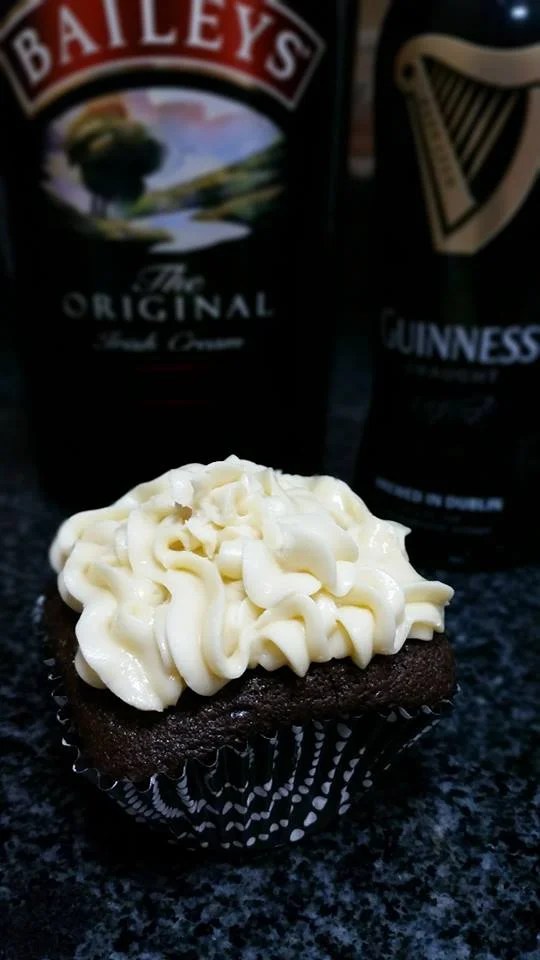
  • Guinness Cupcakes with Bailey’s Buttercream icing

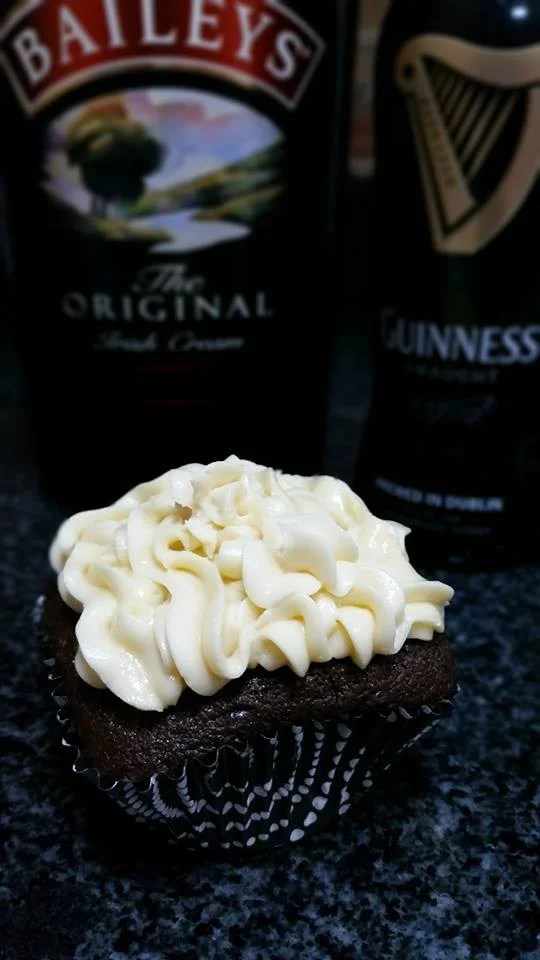
    Guinness Cupcakes with Bailey’s Buttercream icing

    We were invited over to a friends house for dinner and I wanted something for dessert that was a little different. I found a recipe for Guinness Cupcakes and since my husband loves Guinness there always seems to be a bottle or two in the fridge, and this afternoon was no different so I was in luck! This was round two of making these cupcakes. The first batch was good, however, these are scrumptious! Do NOT leave any extra lying around, you will be tempted to eat them all! A definite family and friend favorite!

    INGREDIENTS:

    Guinness and Baileys cupcakes.jpg

    • 1 cup Guinness beer
    • 2 sticks unsalted butter
    • 3/4 cup unsweetened cocoa powder
    • 2 cups all-purpose flour
    • 2 cups sugar
    • 1 1/2 teaspoons baking soda
    • 3/4 teaspoon salt
    • 2 large eggs
    • 1 tsp of vanilla extract
    • 1/2 cup sour cream

    DIRECTIONS:

    Preheat the oven to 350 degrees.  Line two cupcake pans. Because I fill it 3/4 full, it only made 21 cupcakes.

    Melt the butter in a small saucepan, then add the Guinness. Next, add cocoa powder and whisk until smooth.  Bring to a slight boil and then remove from heat and set aside.

    Combine the flour, sugar, baking soda, and salt in a large mixing bowl and mix together.  Whisk the eggs, vanilla and sour cream together until well combined. Next add the beer mixture to the eggs and beat again until combined.  Gradually add to the dry ingredients, mixing until well combined and smooth.

    Fill cupcake liners about 3/4 full with batter.  Bake for 20 minutes or until a toothpick inserted in the middle comes out clean.  Let cool completely on a wire rack before icing (otherwise, icing will melt).

    ICING:

    • 1 1/2 cups butter, at room temperature (3 sticks)
    • 4 1/2 cups powdered sugar, sifted
    • 1 1/2 tsp vanilla extract
    • 3-5 tablespoons Bailey’s Irish Cream (to your taste)

    In a mixer using the paddle attachment whip butter on medium high speed until nearly white and very fluffy, about 7 – 8 minutes, frequently scrapping down the sides of the bowl. Add in powdered sugar, vanilla extract, and Bailey’s and mix on low speed until blended, then increase speed to medium and beat until very light and fluffy, about 5 – 6 minutes, frequently scraping down the sides of the bowl. Immediately spread over cooled cake or cupcakes.

  • Homemade Pizza

    Homemade Pizza

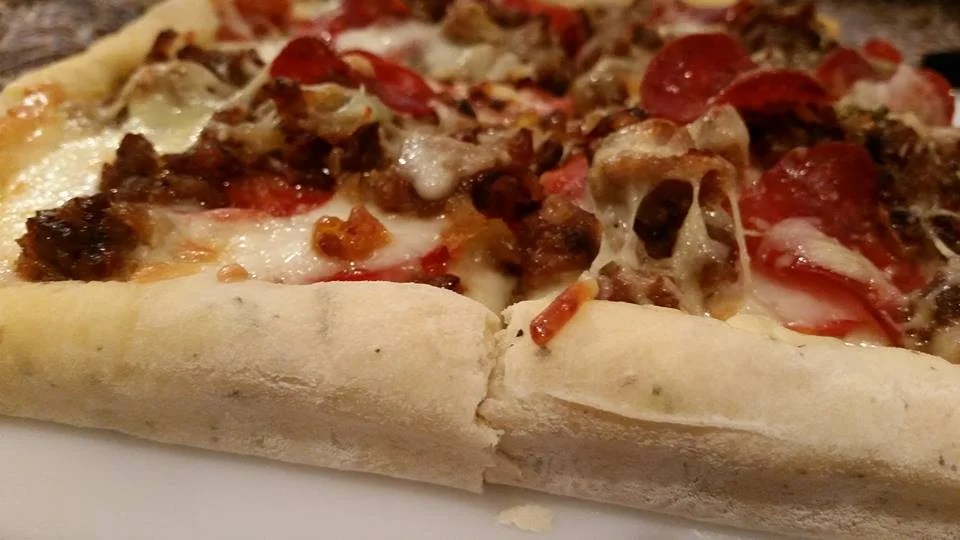
    The request for dinner tonight was homemade pizza! It is one of my favorites and very easy to put together. I also tried out a new crust recipe and it was a hit as well!

    Ingredients:

    • Homemade pizza crust
    • Hot Italian Sausage (one package)
    • 1 yellow onion, diced
    • 1 sweet pepper, diced
    • 3 cloves of garlic
    • red pepper flakes
    • 4 tomatoes, sliced
    • pepperoni, slices
    • 2 cups of mozzarella, grated
    • 1 cup of mild cheddar cheese, grated
    • 1/2 cup of mushrooms, optional 

    Directions:

    Sauté the onions, pepper and garlic. Remove the casing from the sausage and add to the sauteed mixture, cook until done.

    Take your pre-baked crust and sprinkle with red pepper flakes. Next line the crust with the tomatoes and lightly salt them. Cover sparingly with half of the mozzarella cheese. Next add half of the pepperoni slices (however many you would like) and mushrooms and cover with the cheddar cheese. Add the sausage mixture and more pepperoni slices. Next cover with the remaining mozzarella cheese. Bake for 20-25 minutes.

    Slide the pizza out onto a hard surface, cut and serve hot! 

    You can use any toppings you like – these are our favorites!

  • Homemade Pizza Crust

    Homemade Pizza Crust

    Pizza is one of my favorites, especially when it is homemade! Instead of buying pre-made crust, I decided to make my own tonight. Thankfully, it was a hit! It did not rise as well as I thought it would but the crust on the bottom was nice and crisp! I used my stand mixer, however, it would be just as easy by hand. You do need a little prep time as it takes an hour and a half to rise, but once you make this you will not by pre-made again.

    Ingredients:

    • 1 cup of lukewarm water (about 80-100 degrees)

    • 1/2 T of sugar

    • 2 T of olive oil

    • 2 tsp of salt

    • 1 T of Italian Seasoning

    • 1/2 T of Garlic powder

    • 3 cups of flour 

    Directions:

    Add the warm water and sugar to the bowl and stir. Next add the yeast to the bowl. Stir gently and let the yeast mixture stand for about 10 minutes to proof. Add the olive oil, salt, Italian seasoning, garlic powder and flour. Knead the dough slowly for a few minutes until it all comes together, roughly 3-5 minutes. If using a stand mixer, take the bowl out of the machine, remove the hook and cover the bowl for an hour in a nice warm place. If you are not using a stand mixer and are doing it by hand, cover the bowl for an hour in a nice warm place. Next turn it out on a pastry mat or silicone mat and cover with a towel or cling wrap for 30 minutes.

    Heat the oven to 400 degrees. Roll out the dough to desired pan size. I used my large bar pan which is 10 x15 and the crust was medium to thin, similar to a hand tossed version. Put the dough on the pan and bake for 15-20 minutes. Now you are ready to add your toppings and bake your pizza! Enjoy!

  • Chicken Coconut Soup

    Chicken Coconut Soup

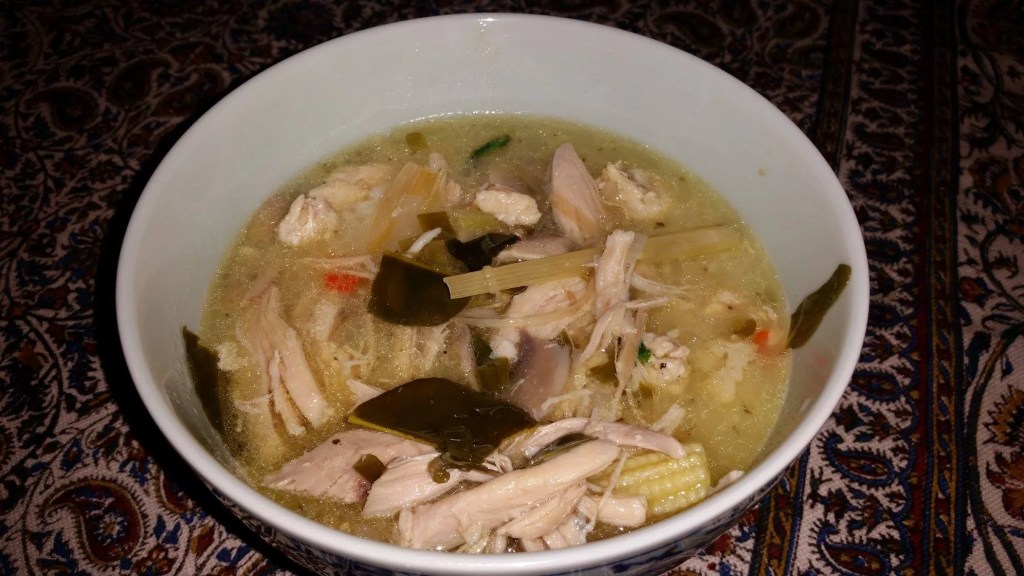
    Tonight I wanted to venture out and make something to compliment my Thai Basil Chicken, and I wanted it to be completely different. The soup went above and beyond my expectations and was so flavorful and absolutely delicious! I even found all the ingredients, which in Bahrain almost never happens. Do not let all the ingredients overwhelm you, it is a quick and simple dish which your family will love!

    Ingredients

    • 5 stalks of lemongrass
    • 2 limes or 4 Tbl of lime juice
    • 4 Tbl of fish sauce
    • 2 scallions (white and green parts), very thinly sliced
    • 6 fresh or frozen wild lime leaves, also known as kaffir lime leaves) torn or cut into quarters.
    • 10-12 slices of ginger (I grated mine)
    • 4-8 Thai chilies, diced (take most of the seeds out & make sure to wash your hands thoroughly after handling the chilies).
    • 1/2 cup of basil leaves
    • 4 chicken thighs, with bone
    • 1 Tbl garlic powder
    • 1 Tbl onion powder
    • 1 tsp salt
    • 1 cup of sliced mushrooms
    • small package of little corn on cob
    • 2-14 oz cans of coconut milk, shake can before opening
    • 3 1/2 cups of chicken broth (made from cooking the chicken thighs)

     Directions

    Place your chicken in a pot. Cover the chicken with water. Next, add the garlic powder, onion powder and salt. Bring to a boil then reduce heat and allow to cook until the chicken is done. While the chicken is cooking, cut the root end and the top 3  inches of each stalk of lemongrass, along with any brittle leaves and discard those. Next take each stalk and lightly pound with an unopened can. Cut each stalk crosswise into 2-inch lengths and set aside.

    In a large serving bowl, combine the lime juice, fish sauce, scallions, and half of the wild lime leaves. Set the bowl aside. When the chicken is done, remove the chicken from the pot, take the chicken off of the bone, and set aside. Measure out the broth and if you have any leftover, store in a container and freeze for any upcoming soups. In a large saucepan, combine the coconut milk and broth. Bring to a gentle boil. Next stir in ginger, lemongrass, chilies and lime leaves. Now add the chicken, mushrooms and corn on cob. Return to a gentle boil, reduce the heat and simmer for 10 minutes.

    Remove from the heat. Stir in the scallion mixture and serve hot.

  • Coca Cola Chocolate Cake

    Coca Cola Chocolate Cake

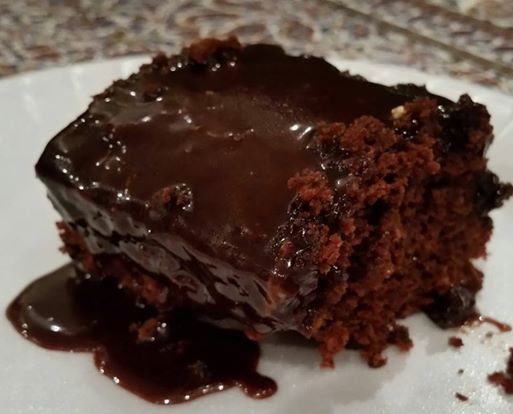
    For Mother’s Day I decided to make myself a chocolate cake, and what goes better with chocolate than Coke? Nothing, except for a nice cup of hot tea! I know, I know most are thinking what? why not milk? Well, milk tends not to agree with me and of late I am cold rather than hot, so I drink at least 3-4 cups of hot tea a day! So before making dinner, which consisted of Garlic Lemon Cheese stuffed chicken (absolutely delicious) with green beans and corn, I made my cake with the help of Nick.

    INGREDIENTS

    CAKE:

    1/2 cup Butter

    1/2 cup Vegetable Oil

    1 cup Coca-Cola

    2 cup flour

    2 cup sugar

    1 tsp baking soda

    3/4 cup Unsweetened Cocoa Powder

    2 eggs

    1/2 cup Buttermilk (or 1/2 cup Milk and 1 tsp Lemon Juice)

    2 tsp Vanilla

    ICING:

    1/2 cup Butter

    1/4 cup Coca-Cola

    1/2 cup Unsweetened Cocoa Powder

    3 cups powdered sugar

    1 tsp Vanilla

    Directions:

    Preheat oven to 350 degrees. Grease and flour a 13×9 cake pan. In a bowl, mix together flour, sugar, baking soda, and cocoa powder. Mix in buttermilk and vanilla. Next, add each egg separately until fully combined. Set aside.

    In a saucepan, melt the butter, then add the Coke and oil, and bring it all to a boil. Remove from the heat. Pour over cake mixture and stir well. Pour into prepared pan and bake for 30 minutes or until toothpick comes out clean.

    Mix butter, cocoa, and coca cola in saucepan and bring to a boil. Remove from heat and add powdered sugar and vanilla, stir.

    Frost the cake while it is still warm.

  • Strawberry Shortcake Recipe

    Strawberry Shortcake Recipe

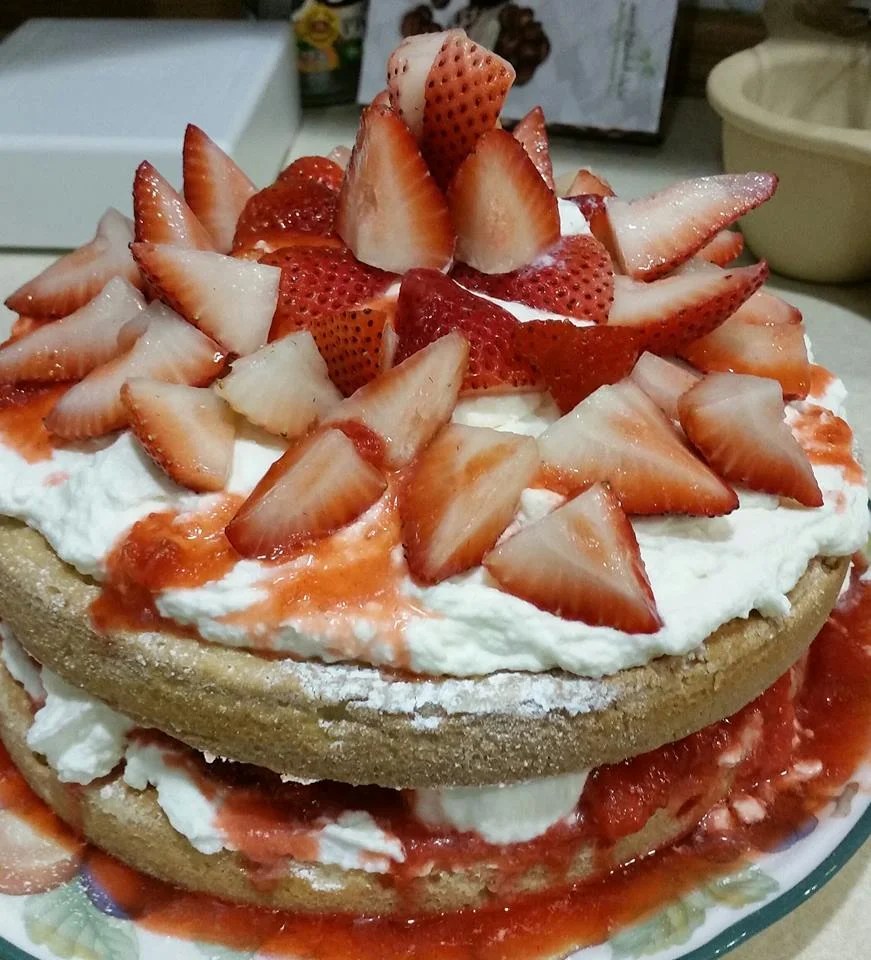
    For Stephen’s birthday I knew I would have to do something different. He does not fancy your typical birthday cakes. His favorite has always been Strawberry Shortcake. So for this year, I decided to find one that was from scratch and do it up right this year for him. It is not overtly sweet, however, it is divine!

    INGREDIENTS:

    White Cake:

    • 2 cups cake flour, I used all-purpose flour
    • 1 1/2 tsp baking powder
    • 1 cup granulated sugar
    • 1/3 cup vegetable oil
    • 1/3 cup water
    • 1 Tbsp pure vanilla extract
    • 4 large eggs, separated
    • 3/4 tsp salt
    • 1/4 tsp cream of tartar
    • Powdered sugar for sprinkling

    Whipped Cream:

    • 3 cups heavy cream, cold
    • 3 tsp  pure vanilla extract
    • 6 T sugar

    Strawberry Filling:

    • 2 cups strawberries, macerated with a touch of sugar (make ahead of time to have enough liquid)
    • 3 cups strawberries, hulled and sliced thin, saving a couple of whole ones for decoration

    DIRECTIONS:

    Vanilla Cake:

    Preheat oven to 350 degrees. Grease and flour two 8-inch cake rounds and set aside. In a medium bowl, stir together the flour, baking powder and 1/2 cup of sugar, set aside. In a larger bowl, whisk together oil, water, vanilla, egg yolks and salt. Add dry mixture in three additions to wet mixture. Fold to combine.

    In a stand mixer, combine egg whites and cream of tartar with a whisk attachment on low speed until mixture is foamy. Increase to medium speed slowly adding remaining sugar. Once all sugar has been added, increase speed until stiff peaks form. Next, add this mixture in three additions to the cake batter. Fold to combine. Divide the batter evenly in the round cake pans.

    Bake for 18-20 minutes or until a toothpick inserted in the center of the cake comes out clean. Do not be alarmed if your cakes do not have a golden brown on top – this is normal. Let cool in the pan for 5-10 minutes, then run a knife gently around the edges and remove the cakes to let cool in a wire rack.

    Whipped Cream:

    Using a stand mixer with whisk attachment or hand held mixer, add cold heavy cream and vanilla whipping on medium speed until it thickens. Next, add the sugar and continue to whip until you have almost stiff peaks.

    Strawberries:

    Macerated Strawberries: Take 2 cups of strawberries and mash with a masher adding 2 T of sugar, chill till ready to use. You want to use all the strawberries and juice letting it overflow on the sides.

    Strawberries: Take 3 cups of strawberries slicing all but a few for your top decoration.

    Assembly:

    Place one of the cooled cakes on your serving plate and sprinkle the top with powdered sugar, next spread the macerated strawberry mixture and then about half of the whipped cream on top of the strawberries. Next add the second cake layer on top and sprinkle with powdered sugar. Add remaining whip cream spreading it all around and then add your sliced strawberries. I also put a dollop of whipped cream in the middle and added extra strawberries on top of it. Chill in fridge until ready to serve.

    Tips:

    • Make sure the cream is very cold; if you have time, chill the whisk (or beaters) and bowl in the freezer for about 15 minutes. This will help the cream whip quickly and will increase its volume.
  • Drive at your own risk

    Driving in Bahrain is not for the weak or timid. You have drivers from all over the world with different rules all merging into one. Below are some general rules that have been posted on TripAdvisor for Bahrain. They are pretty dead on as to how things are here, except perhaps they should include a few truths, like stop signs. They are basically yield signs. You roll right up, look around, if no one is coming then you keep going. The turn lights here turn Red, then yellow then green. You need to be moving when it turns yellow or you will get honked at for being too slow. All in all, you really have to be an aggressive driver and watch everything around you at all times.

    Here are some quick points:

    1. All cars must be legally registered and insured.

    2. All drivers must carry a driver’s license (International driving license required for visitors).

    3. Wear your seat belts.

    4. Respect the speed limit.

    5. Do not cross any red lights.

    6. No drinking and driving. (The slightest smell of alcohol on your breath is enough to get you arrested)

    7. – So please assign a designated driver or call a cab. Don’t ruin your vacation!

    Thinking the above should say ‘Obey the speed limit’ not respect….because most do not adhere to the speed limit, and very few actually get a ticket for speeding.

    Warnings

    1. Always use your signals to indicate where you are going to turn.

    2. Use “Danger” (a.k.a. Double Signal) to indicate immediate stopping or hazard ahead (such as an accident, or obstacle in the middle of the street.)

    3. Be cautious on weekends (Thursday night, Friday, and Saturday) as there are lots of crazy drivers (from neighboring countries) who are not familiar with the traffic laws, or worse – people who try to apply their own country’s rules abroad!

    4. Keep a safe distance between yourself and the car in front of you.

    5. Don’t force your way through or endanger others. If you’ve missed a turn or exit, just continue straight and ask for directions on how to get back (at a traffic light)

    6. Without being too racist/discriminant – watch out for Saudi drivers, taxis, 18-wheelers and the like. (These are renowned for being the worst drivers in Bahrain)

    Headlights / Signal lights / Horns (Other uses)

    You might be thinking, “other uses?” – yes. Driving is sometimes a social game. Full of requests, taunts, warnings, and thank yous.

     Aside from their main purpose, headlights have the following use:

    1. When signalling for a turn, if you see somebody flash you with the headlights (as in turning on the full beams real quick) – this is usually an indication that the other driver is allowing you to pass.

    2. If encountered with the same situation when you are driving on the left lane of a highway and the flash comes from the car that is behind you. This is usually a request to make way. The left lane is considered the “fast lane”, with slower vehicles relegated to the middle and right lanes (the slower you are, the more to the right lane you should be). Expect to see a lot of heavy vehicles and old/slow cars on the right lane. You should give way, since relatively speaking you are slower than the incoming car that’s behind you. However, do this in a careful manner by checking your mirrors and signalling to the right.

     Signal lights have the following use (other than signalling):

    1. If you are requesting that a person make way and he signals to the left (even though there is no turn in sight), understand that the other driver is telling you that he is holding this lane despite his relatively slow speed in order to make an eventual turn.

    2. After giving way or making room for somebody to change lanes, especially when the other driver wants to enter your lane – you may be briefly shown a “Danger”/Double signal. This is a sign of gratitude, a quick “thanks” if you will. Pay attention to the situation and whether it warranted such a gesture. If there was no courteous act committed, then there’s probably a good reason to slam on the brakes!

     Horns have the following uses:

    1. Long horns are usually full warnings – so listen carefully and use them to warn other drivers.

    2. Short horn sounds can be considered as minor warnings (You are about to cross a perpendicular 2-way street and turn left into the second street, a driver may see the front of your car and give a slight warning to indicate that he is close.)

    3. If someone from oncoming traffic is given permission to turn (via headlights), you may be thanked using a short horn (and a wave of the hand).

    4. Taxis are known to honk at “potential” customers (then again, potential customer is anyone without a car/bike), so don’t be alarmed if a short horn sounds when your driving or walking by.

    5. Repeated horn sounds – whether double (beep-beep), triple (beep-beep-beeeeeeeeep), or constant (no need to explain this one) can be associated with impatience. Sound is made to urge the people in front to move on. Double/Triple beeps are usually used at roundabouts and traffic lights if someone is taking too long to move. Constant repeated beeps are indicative of a traffic jam.

    Roundabouts

    Bahrain is starting to phase out most of the problematic roundabouts, as they have been a source of major accidents and traffic jams. Some of these are being replaced by 2/3/4-way intersections. However, there is no guarantee that all roundabouts will be eliminated.

     How to drive in roundabouts:

    1. Some countries give right of way to traffic entering the roundabout (like Beirut). Bahrain however, gives right of way to people INSIDE the roundabout. You will notice the “Give Way” traffic signs at all roundabouts.

    2. Certain roundabouts will have traffic lights placed at them. So even if there are no cars inside the roundabout, you cannot enter if the traffic light is red. Same goes for traffic lights INSIDE the roundabout.

    3. Pay attention to the ground arrows as most roundabouts connect 4 to 6 routes (in a 4-way roundabout, one is your route and the rest are considered exits)

    4. As a general guideline, if you want to turn right or head straight (12-6 o’clock / directional) hold the right lane.

    5. If you want to turn left or go back the way you came (6-12 o’clock / directional) hold the left lane.

    6. Middle lane is usually reserved for straight and left exits. (Applicable to 3-lane roads, 2-lanes only have left/right)

    7. If for some reason you miss your exit, DON’T PANIC. Make another round on the roundabout and attempt it the second time.

    8. WATCH OUT, for people on the right lane attempting to make a left when you’re in the middle lane and trying to go straight. (refer to #7)

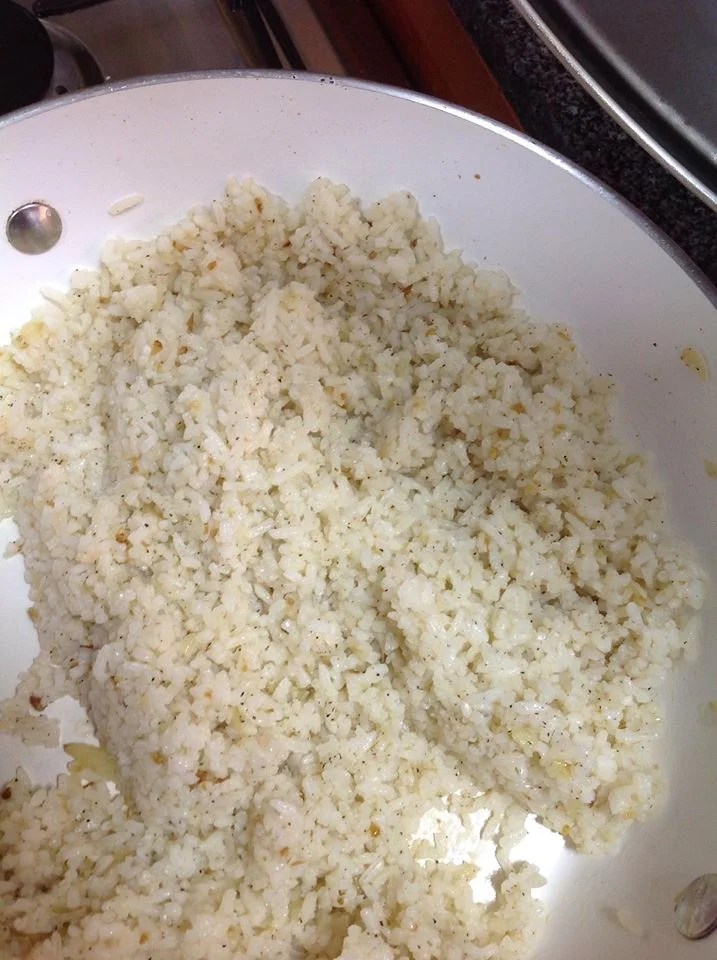
  • Garlic Fried Rice

    Garlic Fried Rice

    This recipe is quick and easy. I always tend to over cook the amount of rice we need for dishes and end up freezing the leftovers so I usually have some rice on hand in the freezer for this dish. You can use fresh rice but it will not behave the same.

    Ingredients

    • 3-4 Tablespoons olive oil
    • 6-8 large clovesgarlic, minced
    • 2 cupsday old white rice (mine was frozen)
    • 1/2 small onion, diced
    • Salt and pepper, to taste

    Directions

    Heat a large skillet over medium heat. Add the olive oil to the pan swirling it around to coat the bottom of the pan. Add the garlic and onion, cook until it just begins to brown – do not let it burn. Stir in the rice and cook for 5-7 minutes just until the rice is a light golden brown. Add salt and pepper to taste. Serve hot.

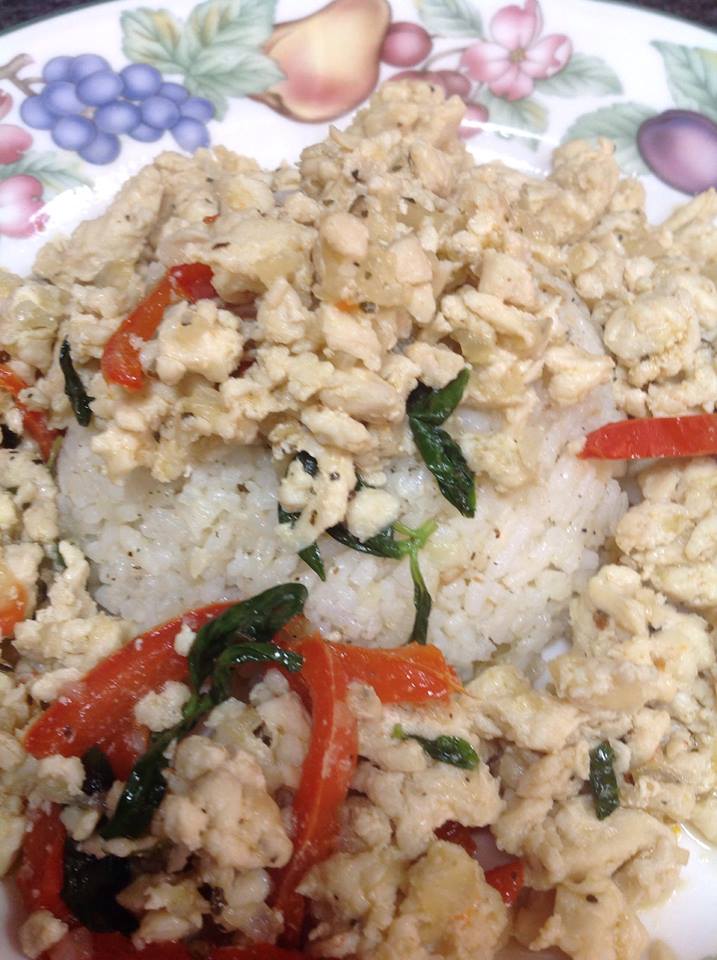
  • Thai Basil Chicken

    Thai Basil Chicken

    OH MY GOODNESS! This dish is so easy to make and it is absolutely delicious! I absolutely LOVE Thai Basil Chicken. We were introduced to a little Thai restaurant here in Bahrain last year, Chompunuch. I sometimes crave their Stir Fried Basil Chicken and decided to make it myself to see how it would turn out. I followed the recipe only adding a basil rub, some peppers and onions, and taking out a few of the peppers as I do not handle spicy well and it was fabulous! The guys gave it two thumbs up!

    Stir Fried Basil Chicken

    • 3 Tablespoons fish sauce
    • 5 cloves of minced garlic
    • 1 small onion, diced
    • 1 red pepper, sliced
    • 1/2 lb ground chicken
    • 1 Tablespoon Basil Rub (I use Pampered Chef)
    • 1-2 packages holy basil (I used fresh basil)
    • 4-7 minced Thai chili peppers
    • 2 tablespoons olive oil

    Directions

    Mince garlic and chili peppers together. Clean basil leaves and pick from their stems. Remember, the basil will shrink down when cooked so don’t worry if you think you have too many basil leaves.

    Sautee the garlic, chili peppers, onion and red peppers in olive oil. Next, add ground chicken and Basil Rub. Cook till chicken is done. Add fish sauce and basil taking care to mix the basil leaves with the meat and to not overcook it (only a couple of minutes). Remove from heat and serve hot with garlic fried rice.  

    TIPS 

    • Make sure to remove the seeds from the chili peppers, unless you like it burning hot!
    • I took a package of chicken breast and used my Food Chopper (Pampered Chef) to dice my chicken up before cooking it.